Hammock camping looks simple until the temperature drops, the wind changes, or the only two suitable trees are farther apart than your suspension straps can reach. Done well, hammock camping is one of the most comfortable ways to sleep outdoors. Done casually, it is a reliable way to spend a cold, damp night pretending you are not miserable.
I like the system because it packs small, keeps you off wet ground, and works particularly well when a tent site is rocky, root-filled, or sloped. But it is not magic gear. The trail finds the weak point, and with a hammock that weak point is usually insulation, suspension setup, or poor site selection.
Why Choose a Hammock Instead of a Tent?
The biggest advantage is separation from the ground. You do not need to flatten a campsite, clear sharp stones, or worry about water collecting beneath your sleeping pad. A properly hung hammock can also be more comfortable for side sleepers than a thin backpacking pad on hard soil. You can get a flatter position by lying slightly diagonally rather than directly along the centerline.
Weight and packed size can be favorable, too. A basic gathered-end hammock, tree straps, bug net, and rain tarp can fit into a compact bundle weighing roughly three to five pounds, depending on insulation and materials. That is not automatically lighter than a modern tent, but it can be competitive for solo trips. Brands such as ENO, Hennessy, Warbonnet, DutchWare, and Kammok offer different approaches, from casual backyard models to serious three-season systems.
The tradeoff is flexibility. A tent can go on a ridge, a beach, open desert, or a treeless alpine basin. Hammock camping requires suitable anchor points, and not every forest gives you two trees with the right spacing, diameter, and health. A vehicle-based trip gives you an advantage because you can carry a backup ground shelter without worrying about shaving every ounce.
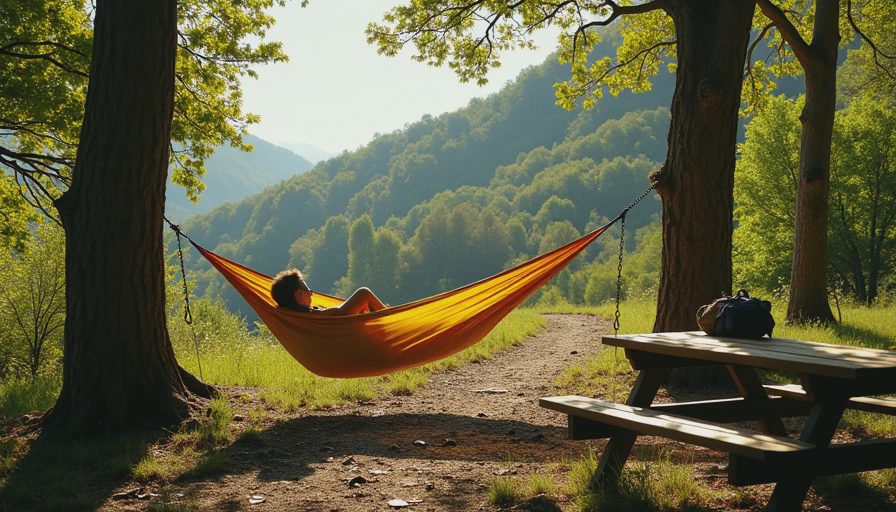
Build a Hammock System, Not Just a Hammock
A hammock by itself is a seat, not a complete sleep system. Start with suspension that is wide enough to avoid damaging tree bark. Webbing straps are preferable to thin cord, and many manufacturers recommend straps around one inch wide. Avoid wrapping bare rope around trees, especially when it can cut into living bark.
Tree spacing matters. Most gathered-end hammocks work well when the anchors are approximately 12 to 15 feet apart, but follow the manufacturer’s guidance. The straps should form a moderate angle rather than running nearly horizontal. A useful rule is to hang the hammock so the lowest point sits roughly chair height above the ground when unloaded. Once you climb in, the fabric will sag, and you should still be able to get out without a wrestling match.
Your ridgeline controls the lay and makes tarp setup more repeatable. A bug net is essential in much of the United States during warm months. For rain protection, choose a tarp that extends beyond both ends of the hammock and has enough coverage for wind-driven rain. Small diamond tarps save weight but provide less side protection than a hexagonal or rectangular tarp. That difference becomes obvious at 2 a.m. when a storm arrives sideways.
Insulation Is Where Beginners Get Burned
The air beneath you removes heat quickly because the hammock fabric compresses your sleeping bag or quilt. A warm sleeping bag alone does not solve that problem. You need insulation underneath, usually an underquilt designed to hang outside the hammock, or a sleeping pad placed inside it. An underquilt generally offers a better fit and reduces the sliding and crinkling that can come with a pad.
For mild summer nights, a three-quarter-length underquilt can save weight. For shoulder-season trips in the Rockies, Appalachians, or high desert, full-length insulation is a safer choice. Rated temperatures are not guarantees; wind, humidity, clothing, and personal metabolism all matter. I would rather carry a little extra insulation than discover that a 40-degree setup is optimistic when the forecast dips into the 30s.
Hammock camping also changes how you pack clothing. Keep a dry base layer reserved for sleeping, store it in a waterproof bag, and avoid climbing into the hammock wearing damp trail clothes. A small foam sit pad can protect your feet from cold air and gives you somewhere to stand while changing. These are inexpensive details, but they make the difference between a pleasant camp and a night spent counting hours until sunrise.

Pick the Site Like a Mechanic, Not a Tourist
Inspect the trees before you hang anything. Choose healthy trunks with no obvious dead branches overhead, cavities, fresh cracks, or unstable root systems. Avoid trees beside dry creek beds, exposed ridges, and low spots where cold air or runoff collects. Do not hang over water, even if the view is excellent. A fall into a stream is not an adventurous upgrade.
Look for a site with enough room to tension the tarp and keep the hammock away from sharp rocks, fire rings, and gear piles. Check the ground beneath you because you will need a safe exit in the dark. I carry a headlamp in the hammock’s ridgeline organizer, not buried in a pack outside. That decision has saved me from stumbling around barefoot more than once.
Leave no trace while setting up. Use existing durable surfaces when possible, keep straps off fragile vegetation, and pack out food scraps and cord trimmings. In some public lands, hanging may be restricted in specific areas or near cultural sites, so check local regulations before arrival. A comfortable camp is not worth damaging a place you came to enjoy.
A Practical Setup Routine
Hammock camping gets easier when the sequence stays consistent. First, inspect both trees and confirm the spacing. Second, attach tree straps at matching heights. Third, connect the hammock and adjust the sag before installing the tarp. Fourth, pitch the tarp with the ridgeline centered and the doors or corners positioned for the expected wind. Finally, add the underquilt and check for gaps along your shoulders, back, and feet.
Before dark, get into the hammock wearing your sleep clothes and test the setup. If your shoulders feel squeezed, raise the suspension slightly or adjust the angle. If your feet are elevated sharply, check whether the hammock is twisting or whether the suspension heights differ. Put your shoes, water, phone, and headlamp where you can reach them without standing up.
Practice at home before taking the system into remote country. A backyard test exposes missing carabiners, confusing tarp lines, and incompatible components without adding cold, fatigue, and a two-hour drive. Looks ready and is ready are different things. That is a garage decision with trail consequences.
What I Would Pack for a Vehicle-Based Trip
For a truck or SUV trip, my basic hammock camping loadout would include the hammock, wide tree straps, a ridgeline, bug net, full-coverage tarp, underquilt, sleeping quilt or bag, dry sleep clothing, headlamp, repair tape, spare cord, and a lightweight ground bivy or emergency shelter. The backup shelter is not overkill when the route includes burned forest, open meadows, or uncertain regulations.
A small repair kit handles most field problems: needle and strong thread for fabric damage, cord locks, replacement guyline, a few zip ties, and tape. I also bring a thermometer because comfort decisions are easier when you know the actual overnight temperature rather than trusting a phone forecast from town. Keep wet gear under the tarp but outside the hammock, where it can dry without adding moisture to your sleep system.
The best hammock is not the one with the most dramatic marketing photos. It is the one that fits your body, your local trees, your weather, and the way you travel. Start with a reliable suspension and insulation system, test it close to home, then take it on a short trip before committing to a remote route. Hammock camping rewards preparation because comfort depends on several small parts working together. The trail finds the weak point; your job is to find it in the backyard first.


No comments yet — be the first to share a thought.